

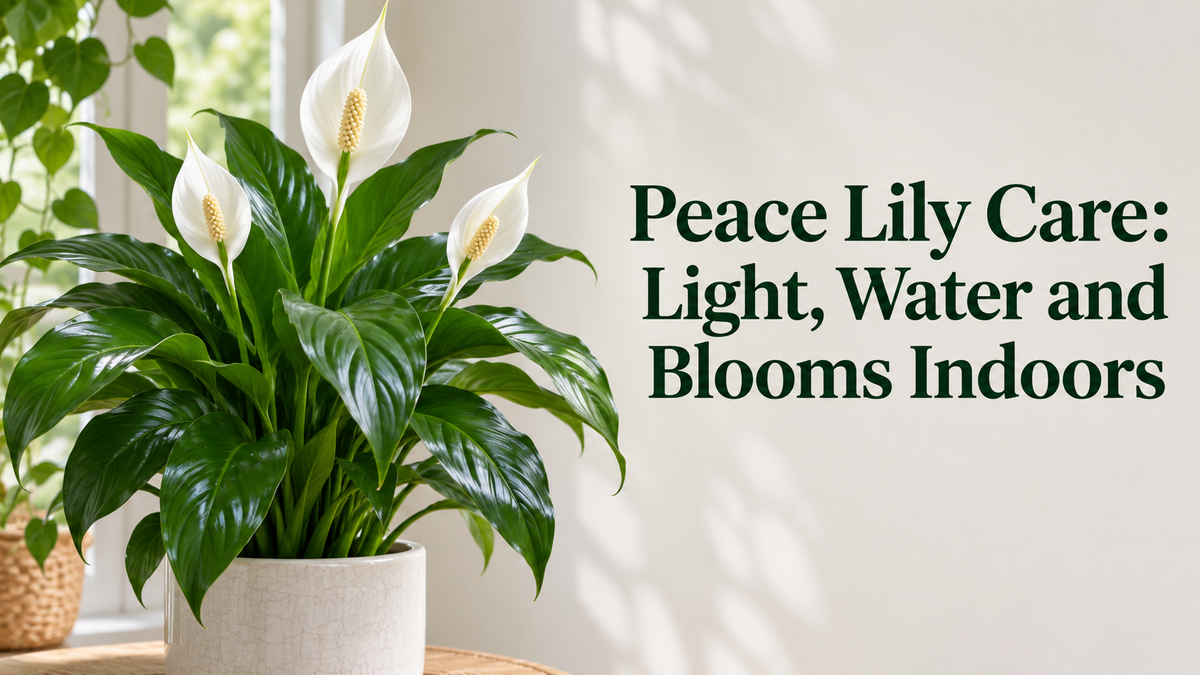
Peace lily care starts with three simple things: gentle light, steady moisture and a pot that drains freely. A peace lily can tolerate a dim corner, but that does not mean it will flower there. Known botanically as Spathiphyllum, this indoor plant carries glossy leaves and a white spathe wrapped around a central spadix. Give it suitable conditions, check the soil before watering, and respond to changes early rather than following a rigid routine that ignores what your plant needs.
Peace Lily Care at a Glance
Use these conditions as a starting point for your plant, then adjust to your room and the way the pot dries.
| Care factor | Starting point |
|---|---|
| Light | Bright, indirect daylight; protect leaves from strong sun. |
| Water | Check the upper inch of soil; avoid a fixed calendar. |
| Humidity | Around 40–60%. |
| Temperature | About 65–80°F / 18–27°C. |
| Soil | Airy, moisture-retentive mix in a draining pot. |
| Feeding | Diluted fertiliser during active growth. |
| Blooms | Usually strongest in spring and summer. |
| Safety | Keep away from pets and children. |
For another beginner guide, try our pothos care article.
Bright Indirect Light Supports Healthy Growth and Blooms
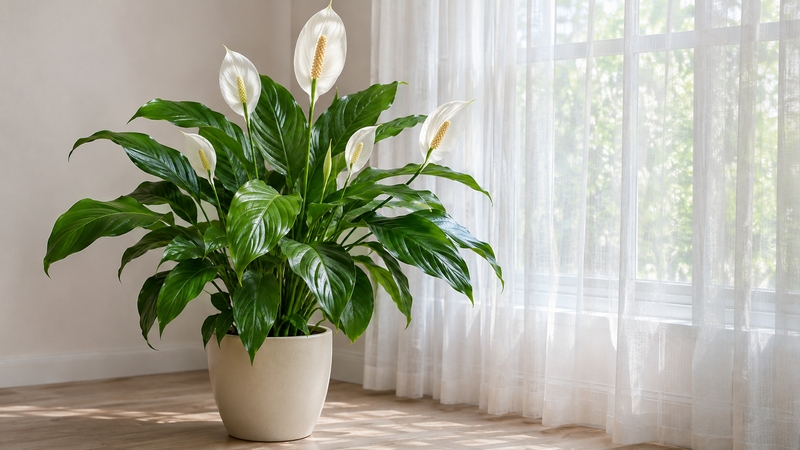
Meeting peace lily light requirements means finding a bright spot where strong sun does not strike the leaves. Aim for roughly 6–8 hours of bright indirect light a day. Beside a window with a sheer curtain is a useful starting point. Gentle morning light may suit the plant, while hot afternoon sun can leave pale, crispy patches.
An east-facing window can work well. A north-facing window may also suit some homes, but window direction alone is not enough. Seasons, nearby buildings and your hemisphere change how much light reaches the leaves. Judge the actual position rather than copying a compass direction.
A peace lily across a dim room may stay alive while growing slowly and producing few flowers. If the leaves look healthy but blooms remain absent, try a brighter position with filtered daylight.
For anyone deciding how to care for peace lily plants in a dark home, an LED grow light offers another option. Follow its placement guidance and watch for signs of excessive exposure.
Good peace lily care also means checking how a move affects watering. A brighter position often dries the mix faster. Recheck the soil after moving the pot rather than keeping the same watering interval. Avoid solving low light by placing the plant in harsh sun.
For more peace lily care guides, browse our Indoor Plant Guides collection.
Watering Works Best When Guided by Soil Moisture
Deciding how often to water peace lily plants starts with the soil, not the day of the week. Push a finger about 1 inch / 2.5 cm into the mix. When that upper layer feels dry, check that the pot is not still heavy and saturated below.
The aim is an evenly moist root ball with air around the roots. Do not leave the plant sitting in water, but avoid letting the whole pot become bone dry repeatedly.
Seven to ten days is only an example interval. Your plant may need water sooner or later depending on light, warmth, pot size and mix. A small pot can dry faster than a large one.
| Conditions | Example interval | Likely drying pattern |
|---|---|---|
| Brighter indirect light | 4–7 days | Faster drying; check moisture more often. |
| Medium indirect light | 5–9 days | A moderate interval between thorough waterings. |
| Low light | 7–12 days | Slower drying; greater risk from watering too soon. |
| Winter with slower growth | 10–14 days | Longer intervals may be needed; heating can still dry the air. |
Water slowly across the surface until excess flows from the drainage holes. Let the pot drain, then empty the saucer or decorative outer pot within about ten minutes. A decorative container should never become a hidden reservoir around the nursery pot.
Use room-temperature water. Rainwater, distilled water or suitable filtered water can help where tap-water minerals contribute to damaged tips.
Consistent peace lily care means repeating the moisture check before each watering. Do not deliberately wait for dramatic collapse as your usual signal. If leaves droop while the soil is wet, adding more water can worsen root stress. Use the drooping checks below before reaching for the watering can again.
For more watering and plant care guides, browse our Plant Care collection.

Moderate Humidity and Steady Warmth Reduce Stress
Aim for roughly 40–60% relative humidity and temperatures around 65–80°F / 18–27°C. These are useful home conditions rather than exact switches that control growth or flowering.
Winter heating and air conditioning can create dry air, especially when the plant sits beside a vent. Cold drafts and chilly window glass add another source of stress. Keep the pot away from these extremes, and avoid temperatures below 60°F / 16°C.
Measure humidity before assuming it explains brown tips. Similar damage can come from minerals, fertiliser salts or uneven watering, so raising humidity alone may not solve it.
If the room stays dry, a humidifier can help maintain steadier conditions. Avoid pushing humidity excessively high; persistently damp conditions can increase fungal problems.
A bathroom may provide humid air, but it still needs suitable light. For peace lily care, a warm, bright room is more useful than a dark room chosen only for humidity.
An Airy Soil Mix Holds Moisture Without Staying Soggy
The best soil for peace lily plants holds some moisture while allowing excess water to escape. Roots need an airy mix, not dense soil that stays heavy for days.
Coir or peat provides the moisture-retaining base. Perlite opens the mix, while orchid or pine bark adds structure and spaces for air. One starting recipe is 60% coir or peat, 25% perlite and 15% bark by volume. Adjust the balance if your home conditions make it dry unusually quickly or slowly.
A slightly acidic mix, around pH 5.5–6.5, fits the research guidance for peace lily care. For most beginners, choosing suitable houseplant ingredients matters more than chasing a precise reading.
Drainage holes are essential. Even an airy mix can become waterlogged inside a sealed pot. Avoid garden soil and clay-heavy soil, which can compact around indoor roots.
Refreshing worn mix is part of peace lily care. Check its condition as the plant grows; replacing it around repotting time can restore structure without moving the plant into a much larger container simply because time has passed.
Light Feeding Supports Growth Without Salt Buildup
Peace lilies need little fertiliser. During active spring and summer growth, a balanced houseplant feed at half strength every four to six weeks can be a starting routine. Adjust this to the product directions and your plant’s response.
A balanced formula such as 10-10-10 supplies the main nutrients without treating flowers as a reason to apply extra feed. More fertiliser will not replace adequate light.
Reduce or pause feeding when growth slows. Never fertilise a stressed plant, and give newly repotted plants time to settle before restarting.
Brown tips, a pale salt crust on the mix and leaf drop can signal excess feeding. Pause fertiliser and flush a freely draining pot with distilled water or rainwater. Gentle peace lily care is safer than repeatedly feeding a plant that looks unhappy.
Repotting and Division Keep Crowded Plants Manageable
Repotting Signs and a Modest Pot Increase
Repotting peace lily plants is best guided by roots and soil condition. Roots circling tightly or growing through drainage holes, mix drying unusually fast, and water running straight through can suggest a crowded root ball.
Many plants need attention within twelve to twenty-four months, but inspect before acting. Spring or another period of active growth is usually the easiest time. Delay routine repotting during heavy flowering or winter slowdown.
Water an hour or two beforehand if needed. Choose a draining pot only 1–2 inches / 2.5–5 cm wider. Ease the plant out, loosen crowded roots gently and add fresh mix. Keep the crown at its previous depth, then water and drain thoroughly.
Division Produces New Rooted Plants
A healthy, established plant can be divided during spring or early summer. Wear gloves, remove the pot and separate clumps carefully. Each division needs its own roots and two or three leaves.
Leaf and stem cuttings do not produce new peace lily plants. Division is the reliable home method.
Pot each section into a container suited to its roots. Keep it warm, in indirect light, with steady moisture and humidity while it settles. Check each section regularly without leaving its pot standing in collected water. Pause feeding after division; waiting around six weeks after repotting is a cautious approach.
This part of peace lily care should leave roots room to grow without surrounding them with excessive wet mix.

Drooping Leaves Need a Soil Check Before More Water
A peace lily drooping can look alarming, but check the soil. Thirst and damaged roots can produce similar-looking leaves while needing opposite responses.
| Soil and signs | Likely issue | First action |
|---|---|---|
| Dry mix and a light pot | Thirst | Water thoroughly, then drain. |
| Wet mix and persistent wilt | Root stress or poor drainage | Stop adding water; inspect drainage and roots. |
| Soggy mix, unpleasant smell or soft roots | Possible root rot | Inspect the root system and address damaged roots. |
| Recent division or repotting | Adjustment stress | Keep conditions steady and check moisture carefully. |
A thirsty plant may lift its leaves within a few hours, but recovery is not a timed test. Temperature, root condition and the severity of drying affect the result.
Root rot does not recover simply because more water is added. If the pot is wet, repeated watering can worsen the problem.
Also check for cold drafts, a cramped root ball or a recent move. Match your response to the conditions around the roots rather than the appearance of the leaves alone.
Brown Tips Point to Water Quality, Salts or Moisture Stress
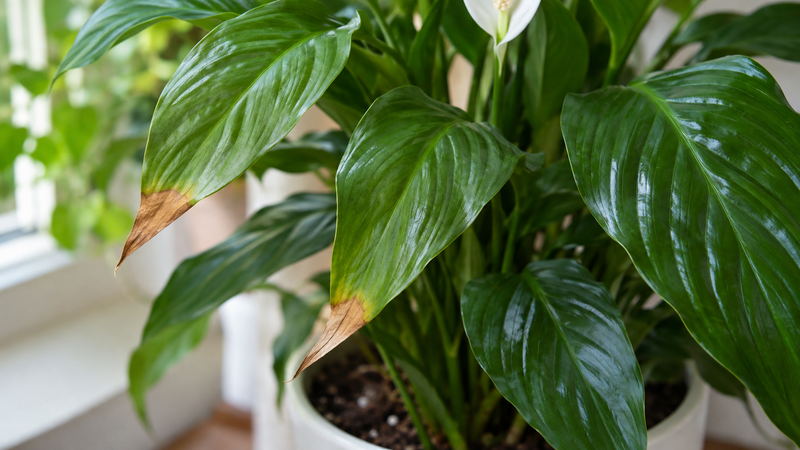
Treat peace lily brown tips as a reason to review conditions, not as proof of one problem. Low humidity, tap-water minerals, fertiliser salts and inconsistent watering can damage leaf edges.
Crispy tips may accompany dry air or water-quality problems. Brown edges can occur with salts or moisture stress. Patches concentrated on the sun-facing side suggest scorch. Soft tissue with soggy soil or an unpleasant smell points toward root trouble instead.
Start with the soil check, then review your water source, feeding routine and position. Move the plant away from hot sun, heaters and drafts where needed.
If salts have accumulated, flush the mix with distilled water or rainwater, allowing it to drain freely. Empty the outer pot afterwards and pause feeding. Avoid treating a soggy, struggling root ball as though it simply needs more water.
Brown tissue never turns green again. Trim dead tips with clean scissors, following the leaf shape and avoiding healthy tissue. The sign of improvement is healthier new growth, not a repaired old edge.
Make changes patiently rather than switching water, fertiliser and position every day — steady peace lily care works better than constant changes.
Yellow Leaves Need Context Before Treatment
Think of peace lily yellow leaves as a symptom to investigate. One or two oldest leaves fading slowly can be normal ageing, especially when the rest of the plant looks healthy.
Spreading yellowing needs closer attention. Prolonged wetness and root problems often affect older, lower leaves, but excessive drying can also damage foliage. Check soil moisture and drainage before changing the watering routine.
Pale growth can accompany inadequate light. Yellow tissue between green veins may suggest a nutrient issue involving iron or magnesium, but appearance alone cannot confirm a deficiency. Do not add supplements simply because a photograph online looks similar.
Fully yellow leaves will not become green again. Remove them at the base with clean scissors, then watch the remaining leaves and new growth.
Peace lily care means judging the overall pattern: which leaves change, how quickly it happens and whether the root ball stays wet or dries excessively.
Better Light and Stable Care Encourage Repeat Blooming
The answer to “why is my peace lily not blooming” usually starts with light. A plant may maintain green leaves in a dim position without collecting enough energy to flower regularly.
Move it to brighter indirect light, protected from strong sun. Check watering again after the move because the mix may dry faster. Keep the root ball evenly moist, provide steady warmth and feed modestly during active growth.
Flowering is seasonal, often strongest in spring and summer. Gaps between blooms are normal. Young plants, recently divided clumps and plants recovering from root stress may need time to establish themselves before flowering.
Nursery peace lilies may be treated with gibberellic acid, often called GA3, to induce blooms for sale. When that effect wears off, the plant returns to flowering according to its maturity and home conditions. A shop-bought display is not a promise of constant flowers.
Review feeding as part of your peace lily care routine if the plant produces plenty of foliage but little else. Excess nitrogen and heavy fertiliser use are not a dependable route to blooms. Improve light and stable growing conditions before trying another product.
Remove spent flower stalks at the base with clean scissors. This tidies the plant without asking an ageing stalk to flower again.
Good peace lily care supports future blooms, but it cannot set their arrival date. Judge progress through healthy roots, fresh foliage and steady growth rather than expecting flowers within a fixed number of weeks after making a change.
Peace Lilies Belong Out of Reach of Pets and Children
Peace lilies contain calcium oxalate crystals that can irritate the mouth, tongue and throat when plant material is chewed or swallowed. Keep the whole plant away from pets and young children.
Choose a secure position they cannot reach, rather than relying on a high shelf that a climbing pet can access. Clear away fallen leaves, flowers and pruning scraps promptly.
Wear gloves when dividing, trimming or repotting because the sap can irritate skin. Keep tools and loose plant pieces out of reach while working.
Despite the name, peace lilies are not true lilies. They belong to the arum family, Araceae. That botanical difference does not make them safe to chew.
If a child or pet eats any part, contact an appropriate medical or veterinary professional for advice. Do not wait for the plant to cause obvious problems before seeking help.
FAQs
Can a peace lily grow in low light?
Yes, it can survive lower light, but growth is usually slower and flowering less reliable. Choose brighter indirect light if you want stronger growth and a better chance of repeat blooms over the year.
Can I water my peace lily with tap water?
You can, but fluoride, chlorine and mineral buildup may contribute to brown tips. Consider rainwater, distilled water or suitable filtered water. Leaving tap water overnight does not reliably remove fluoride or dissolved minerals. Check your supply first.
Should I cut the brown tips off my peace lily?
Yes. Use clean scissors to trim dead tissue without cutting healthy green leaf. Brown areas will not turn green again, so also address the watering, salts or dry air causing damage. Prevention matters most.
Why are my peace lily flowers turning green?
The white spathe naturally becomes green as it ages and develops chlorophyll. Ageing blooms will not return to fresh white. Snip a spent flower stalk at the base when it fades. This is normal.
Can I propagate a peace lily from a cutting?
No. Leaf and stem cuttings will not produce a new plant. Divide a mature clump instead, keeping roots and healthy leaves on each section, then provide gentle aftercare while it establishes.
Sources
- RHS — How to grow peace lilies: https://www.rhs.org.uk/plants/peace-lilies/how-to-grow-peace-lilies
- Clemson Extension — Peace Lily: https://hgic.clemson.edu/factsheet/peace-lily/